Our next AMPS / IPMS meeting will be held on May 2, 2016. As usual, the AMPS meeting will start at 6pm and the IPMS Toronto meeting at 7pm.
At the IPMS Toronto meeting we will be happy to host a seminar presented by Sandy McRorie where he will explain and demonstrate how he finishes resin base plates manufactured by Barbakan.
Bring out your ongoing and completed projects – we hope to see you all there.
Please enjoy this fantastic video of a figure painting seminar conducted by IPMS Toronto member Ying Louie at our February 2016 club meeting. Ensure you also read through the comprehensive notes below which Ying provided to supplement the video. Credit for the video goes to Robert Wlodarek.
Additional Notes:
The question asked is how do you paint figures? There are two most common methods being paints in oil and acrylics. The talk about painting will include the discussion of tools and importantly the care/use of the paintbrushes. The other areas that require thought are in the perceptions of painting. The main point in any painting of figures is that we look at the figures “HEAD” first, and this is the feature in any figure painting that stands out, so we strive our best in this area.
Many years we are impressed on painting figures. First we have to remember this is for fun. There is no right or wrong way going about it. What ever your method is great for you as long as it works to your taste. First thing about our choices is the figures, scale, and the quality. I wish to tell all that if a figure is poor in quality, don’t get it, and that it will affect your desire to like painting. BAD IS BAD.
QUALITY is the first thing about figures.
The detail dictates how well it paints.
If it is poor in detail, it will show how bad that will paint.
Plastic, resin, and white metal are the most common available. The best I’ve seen are most in the areas of resin and metal.
The most important to see is the quality of the head.
Imperfect sculpting is also a sign of poor figures.
When in doubt always have a known quality figure scale to compare.
SCALE is important especially if the figures are included in display with others.
Be careful with scale many manufacturers are claiming the correct scale, but get mixed ie. 1/35 really 1/32? Proportions are easy seen by the eye. The best comparisons are these figures placed next to a plastic figure.
SEAMS & CLEANING Using the right tools will bring the manufacturing of seams and gaps away. This will show and detract from your painting. Files, sanding, scraping, buffing, and using gap fillers to hide these areas will help improve the look of your figures.
PRIMER Why is it important? For figures this is very important due to the fact figures are handled frequently! Paint needs to adhere and primer is your assistant. Choose the primer, it is a matter of taste either black, red, grey, or white. Please remember that if your using a spray can please shake it thoroughly to blend the paint. Smooth and flat is the finish you should desire.
THE TOOLS
It is truly in this subject that we make the transition from modeller to artist. All the other common hobby paint and tools are exchanged for those use by a fine artist. I will state here that there is no easy or short cut methods. Using these tools are a set method and tried true tested by time. Get to know your paint and tools.
Assembly is to clean your figures of any imperfections. Using your sand paper, x-acto knife, steel wool, files. Mould lines are the main area to remove common. Always be aware of your health while cleaning figures, white metal may have lead, resin will have resin dust and vapour when warmed by sanding. It is wise to wash your figures in soap and water. Pliers, razor saw, 5 min epoxy, pin vies, primer automotive brand, a magnifying glass or reading glasses also help to see closely to the fine work involved.
Using 5 min Epoxy is best to apply cementing your figures either white metal or resin. Epoxy is best for it’s lasting and durable strength. Heavy items and large figures requires you to drill and pin the parts for better security. Allow your figure to dry 24hrs. Inspect your assembly and cleaning. It is wise to drill and hole into the figures boot and pin it to have a place to hold your figure while painting.
Primer is usually from a spray can for me. Either automotive or hobby paint. Shake it thoroughly for best results, and allow to dry for 24hrs. Inspect your figures at every start of a new phase for dust, hair, or specks of dirt. This will show in your paint. Block in colours, all figures have a foundation of base colours. Flesh paint for faces, red paint for tunics. These base colours are either acrylic or enamel paints. Always safe to allow your work 24hrs to dry.
Always remember if painting in acrylics, then use an enamel base paint. If painting in oil use an acrylic based paint.
Paint Brushes
Brushes for fine work should be your best investment. Red Sable/Kolinsky Sable round brushes 0-1 size are best suited for the painting being there is enough hairs to keep the shape and point. Sizes 00-0000 are small and tend to lose their shape soon. All this will be based on your preference. Broad work and feathering you will find suitable in the brush sizes 1-4 series flats. Invest in at least 4 brushes of the same size each. Use primarily real hair brushes, for they will have the most resilience to last. Synthetic tends to “hook” in the hairs. Please avoid jabbing with your brushes as well that causes the hook in the brush. With oil paint it is best to use one and drop it for another especially when feathering oils. Grumbacher artist medium one is an artist medium that helps the flow and blending of the oil.
Painting basics
Look at your figure and understand your painting with the direction of light 3/4 above either to the left or right 10 or 2 o-clock. This will dictate your shade and shadow process.
Painting eyes
To paint or not! Depends on the size of the figure, and whether or not it’s face is squinting! Smaller than 1/35 or 54mm looking at a real person that far away to match the size is such the eyes are in shadow.. Larger than 1/35 we have more area to paint eyes. Looking at eyes and images you will note that the whites of the eyes are not truly white rather an off white mixed in with flesh tones. Paint the upper eye lids darker than the lower remember shadow. It is usually a red mixed with flesh tone. Same applies to the lips outline the shadows of the hairline next to the face and where flesh meets the clothing. When painting eyes it is wise to paint the eyes upside down. Getting the flesh tone right is the key to the whole figure. It is where we all look at first. Of course it is the hardest part of the figure
Acrylic paints
Acrylic retarder is for acrylic paints to help spread the paint and slow the working time of the paint.
A water based paint quick drying. Most have heard the name Vallejo, and Tamiya. Vallejo comes in many colours and VallejoAir airbrush brands. For me I find Vallejo is delicate in handling and tends to rub off. VallejoAir is very finicky with low air pressure. Tamiya has had some chemical changes lately and have become more lacquer based. There are the new artist brands like that of Windsor Newton, Stephensons, Golden, and ComArt brands these are all great brands that I haven’t tried on figures yet except that of Vallejo.
Like all paints, shades and shadows are applied through washes. Highlights are performed in methods of strategic blocking tints, some call it glazing.
The basic method is by applying the base colour then wash in progressive darker tints into the shadow just like traditional artists. After all the paint is done and you are happy with the look it is wise to allow 24hrs to set. To conclude paint finish should be sealed and protected with a clear coat finish. Use a blow dryer it will help speed the finish to dry. I find acrylic paints work best from 1/35 scale and smaller. Larger figures I find is harder to blend in the acrylic methods.
Oil Paints
Timeless Traditional Oil
Return to the era of the masters! Some of the best canvas painters and figure painters render in oil. Unlike washes in acrylic to blend colours, oil comes in a natural paste that blends well itself. The oil paint quality is subjective to the user based on Student/Artist quality.
Student quality oil
Is a paint more in oil and less pigment. To add the paint tends to colour fade sooner over the years. For me I haven’t seen much change over the years. Price point is more affordable than artist quality brands. What we need to do is to work with what we have.
Artist quality oil
Richer in pigment, minimal oil, permanence in colour, and smoother blend paint. The price point is the part that is hardest to accept that rich cadmium colours are well over $60 and higher for each colour.
Painting with oil is the process of painting dark colours to light. It is the opposite of painting acrylics. To add oil paint is a translucent paint that allows the under layers to show and provide the viewer with dimensional depth of colour. Oil will take up to 5 days to completely dry. If allowed to dry in it’s natural state, the finish will have a gloss shiny sheen. It is that sheen that provides depth of colour, that brilliance and vibrant look that makes a figure stand out as a painting.. Unfortunately that figures in the miniature world aren’t shiny so we have to surrender to the dull coat clear spray. Another method to dry oil paint is to bake the figure in the oven or a crock pot carefully not to melt it. The temperature should be that of a warm hot summer day.
Techniques
With a figure blocked with colour we use the paint mediums acrylic/oil to shade and shadow, highlight the base colour.
We brush on small amounts of paint with a fine brush, and we feather away the colour with a broad brush. With acrylic we use slightly darker progressive tints of wash to create the shadows. Highlights are brushed in as well and blended with oil and progressive brighter tints with acrylic. Do not jab or dab with your fine pointed brushes it will cause your brush point to hook. Hooks can ruin the effectiveness of losing your brush point.
Cleaning
Cleaning your brushes use White mineral spirits, odourless turpentine to clean your oil paint from your brushes. Soap and water is common for acrylic paints. When cleaning your best to blot your brush, and minimize wiping that will tend to lose hairs from your ferrule. After cleaning out the paint it is wise to dip your brushes into Windsor Newton brush cleaner this will remove any left over paint and use soap and water to conclude your brush cleaning. Wet your brush into the soap to preserve and store your brush into a point.
My absolute favourite cleaner is Windsor Newton brush cleaner. It’s qualities are how well it cleans including your airbrush.. Be warned! This cleaner will damage plastic including plastic paint containers.
My last words are please remember that we do this art-form not for an award. That we should not gauge our art to that of others expectations rather like Lester Plaskit states “It was the joy of journey finishing your latest art!”
Digging into the archives again, please enjoy this extremely informative how-to article about modeling the Brewster Buffalo in Belgian service, written by Didier Waelkens and published in the IPMS Toronto newsletter in October 1994.
Part 2 of the Adam Wilder video introduced earlier:
In September of 2015, local hobby shop Hornet Hobbies was kind enough to host a series of seminars conducted by world-renowned modeler Adam Wilder. Members of IPMS Toronto were invited to attend and we were permitted to video record the sessions and offer them to the public. Please enjoy the wealth of knowledge shared here in the first of the Adam Wilder videos. Video is courtesy of Robert Wlodarek.
In September of 2015, local hobby shop Hornet Hobbies was kind enough to host a series of seminars conducted by world-renowned modeler Adam Wilder. Members of IPMS Toronto were invited to attend and we were permitted to video record the sessions and offer them to the public. Please enjoy the wealth of knowledge shared here in the first of the Adam Wilder videos. Video is courtesy of Robert Wlodarek.
At our February 2016 IPMS Toronto meeting we will be honoured to receive yet another fantastic seminar by member Ying Louie. This seminar will cover the topic of figure painting and will be in a similar format to his fantastic diorama presentation of last year.
In preparation for this seminar, we’re posting Ying’s notes so you can review in advance and prepare some of your own questions for Ying.
The question asked is how do you paint figures? There are two most common methods being paints in oil and acrylics. The talk about painting will include the discussion of tools and importantly the care/use of the paintbrushes. The other areas that require thought are in the perceptions of painting. The main point in any painting of figures is that we look at the figures “HEAD” first, and this is the feature in any figure painting that stands out, so we strive our best in this area.
Many years we are impressed on painting figures. First we have to remember this is for fun. There is no right or wrong way going about it. What ever your method is great for you as long as it works to your taste. First thing about our choices is the figures, scale, and the quality. I wish to tell all that if a figure is poor in quality, don’t get it, and that it will affect your desire to like painting. BAD IS BAD.
QUALITY is the first thing about figures.
The detail dictates how well it paints.
If it is poor in detail, it will show how bad that will paint.
Plastic, resin, and white metal are the most common available. The best I’ve seen are most in the areas of resin and metal.
The most important to see is the quality of the head.
Imperfect sculpting is also a sign of poor figures.
When in doubt always have a known quality figure scale to compare.
SCALE is important especially if the figures are included in display with others.
Be careful with scale many manufacturers are claiming the correct scale, but get mixed ie. 1/35 really 1/32? Proportions are easy seen by the eye. The best comparisons are these figures placed next to a plastic figure.
SEAMS & CLEANING Using the right tools will bring the manufacturing of seams and gaps away. This will show and detract from your painting. Files, sanding, scraping, buffing, and using gap fillers to hide these areas will help improve the look of your figures.
PRIMER Why is it important? For figures this is very important due to the fact figures are handled frequently! Paint needs to adhere and primer is your assistant. Choose the primer, it is a matter of taste either black, red, grey, or white. Please remember that if your using a spray can please shake it thoroughly to blend the paint. Smooth and flat is the finish you should desire.
THE TOOLS
It is truly in this subject that we make the transition from modeller to artist. All the other common hobby paint and tools are exchanged for those use by a fine artist. I will state here that there is no easy or short cut methods. Using these tools are a set method and tried true tested by time. Get to know your paint and tools.
Assembly is to clean your figures of any imperfections. Using your sand paper, x-acto knife, steel wool, files. Mould lines are the main area to remove common. Always be aware of your health while cleaning figures, white metal may have lead, resin will have resin dust and vapour when warmed by sanding. It is wise to wash your figures in soap and water. Pliers, razor saw, 5 min epoxy, pin vies, primer automotive brand, a magnifying glass or reading glasses also help to see closely to the fine work involved.
Using 5 min Epoxy is best to apply cementing your figures either white metal or resin. Epoxy is best for it’s lasting and durable strength. Heavy items and large figures requires you to drill and pin the parts for better security. Allow your figure to dry 24hrs. Inspect your assembly and cleaning. It is wise to drill and hole into the figures boot and pin it to have a place to hold your figure while painting.
Primer is usually from a spray can for me. Either automotive or hobby paint. Shake it thoroughly for best results, and allow to dry for 24hrs. Inspect your figures at every start of a new phase for dust, hair, or specks of dirt. This will show in your paint. Block in colours, all figures have a foundation of base colours. Flesh paint for faces, red paint for tunics. These base colours are either acrylic or enamel paints. Always safe to allow your work 24hrs to dry.
Always remember if painting in acrylics, then use an enamel base paint. If painting in oil use an acrylic based paint.
Paint Brushes
Brushes for fine work should be your best investment. Red Sable/Kolinsky Sable round brushes 0-1 size are best suited for the painting being there is enough hairs to keep the shape and point. Sizes 00-0000 are small and tend to lose their shape soon. All this will be based on your preference. Broad work and feathering you will find suitable in the brush sizes 1-4 series flats. Invest in at least 4 brushes of the same size each. Use primarily real hair brushes, for they will have the most resilience to last. Synthetic tends to “hook” in the hairs. Please avoid jabbing with your brushes as well that causes the hook in the brush. With oil paint it is best to use one and drop it for another especially when feathering oils. Grumbacher artist medium one is an artist medium that helps the flow and blending of the oil.
Painting basics
Look at your figure and understand your painting with the direction of light 3/4 above either to the left or right 10 or 2 o-clock. This will dictate your shade and shadow process.
Painting eyes
To paint or not! Depends on the size of the figure, and whether or not it’s face is squinting! Smaller than 1/35 or 54mm looking at a real person that far away to match the size is such the eyes are in shadow.. Larger than 1/35 we have more area to paint eyes. Looking at eyes and images you will note that the whites of the eyes are not truly white rather an off white mixed in with flesh tones. Paint the upper eye lids darker than the lower remember shadow. It is usually a red mixed with flesh tone. Same applies to the lips outline the shadows of the hairline next to the face and where flesh meets the clothing. When painting eyes it is wise to paint the eyes upside down. Getting the flesh tone right is the key to the whole figure. It is where we all look at first. Of course it is the hardest part of the figure
Acrylic paints
Acrylic retarder is for acrylic paints to help spread the paint and slow the working time of the paint.
A water based paint quick drying. Most have heard the name Vallejo, and Tamiya. Vallejo comes in many colours and VallejoAir airbrush brands. For me I find Vallejo is delicate in handling and tends to rub off. VallejoAir is very finicky with low air pressure. Tamiya has had some chemical changes lately and have become more lacquer based. There are the new artist brands like that of Windsor Newton, Stephensons, Golden, and ComArt brands these are all great brands that I haven’t tried on figures yet except that of Vallejo.
Like all paints, shades and shadows are applied through washes. Highlights are performed in methods of strategic blocking tints, some call it glazing.
The basic method is by applying the base colour then wash in progressive darker tints into the shadow just like traditional artists. After all the paint is done and you are happy with the look it is wise to allow 24hrs to set. To conclude paint finish should be sealed and protected with a clear coat finish. Use a blow dryer it will help speed the finish to dry. I find acrylic paints work best from 1/35 scale and smaller. Larger figures I find is harder to blend in the acrylic methods.
Oil Paints
Timeless Traditional Oil
Return to the era of the masters! Some of the best canvas painters and figure painters render in oil. Unlike washes in acrylic to blend colours, oil comes in a natural paste that blends well itself. The oil paint quality is subjective to the user based on Student/Artist quality.
Student quality oil
Is a paint more in oil and less pigment. To add the paint tends to colour fade sooner over the years. For me I haven’t seen much change over the years. Price point is more affordable than artist quality brands. What we need to do is to work with what we have.
Artist quality oil
Richer in pigment, minimal oil, permanence in colour, and smoother blend paint. The price point is the part that is hardest to accept that rich cadmium colours are well over $60 and higher for each colour.
Painting with oil is the process of painting dark colours to light. It is the opposite of painting acrylics. To add oil paint is a translucent paint that allows the under layers to show and provide the viewer with dimensional depth of colour. Oil will take up to 5 days to completely dry. If allowed to dry in it’s natural state, the finish will have a gloss shiny sheen. It is that sheen that provides depth of colour, that brilliance and vibrant look that makes a figure stand out as a painting.. Unfortunately that figures in the miniature world aren’t shiny so we have to surrender to the dull coat clear spray. Another method to dry oil paint is to bake the figure in the oven or a crock pot carefully not to melt it. The temperature should be that of a warm hot summer day.
Techniques
With a figure blocked with colour we use the paint mediums acrylic/oil to shade and shadow, highlight the base colour.
We brush on small amounts of paint with a fine brush, and we feather away the colour with a broad brush. With acrylic we use slightly darker progressive tints of wash to create the shadows. Highlights are brushed in as well and blended with oil and progressive brighter tints with acrylic. Do not jab or dab with your fine pointed brushes it will cause your brush point to hook. Hooks can ruin the effectiveness of losing your brush point.
Cleaning
Cleaning your brushes use White mineral spirits, odourless turpentine to clean your oil paint from your brushes. Soap and water is common for acrylic paints. When cleaning your best to blot your brush, and minimize wiping that will tend to lose hairs from your ferrule. After cleaning out the paint it is wise to dip your brushes into Windsor Newton brush cleaner this will remove any left over paint and use soap and water to conclude your brush cleaning. Wet your brush into the soap to preserve and store your brush into a point.
My absolute favourite cleaner is Windsor Newton brush cleaner. It’s qualities are how well it cleans including your airbrush.. Be warned! This cleaner will damage plastic including plastic paint containers.
My last words are please remember that we do this art-form not for an award. That we should not gauge our art to that of others expectations rather like Lester Plaskit states “It was the joy of journey finishing your latest art!”
Renown armor modeller and teacher of the modelling arts, Adam Wilder, travels from the US to Hornet Hobbies to present several seminars on the Sept. 18-20 weekend. Join for this rare opportunity to up your modelling game and learn specialized techniques.
All clinics held at Hornet Hobbies: 1563 O’Connor Drive Toronto M4B 2V7
Clinics are limited to 14 participants. Registration is not guaranteed until full payment is received. Thank you for your understanding. Call 416-755-4878 for further details and to reserve your spot!
Friday September 18 (Clinics A & B repeated Sunday September 20) Clinic A: METAL WORKS 9:30 – 12:00 $25.00
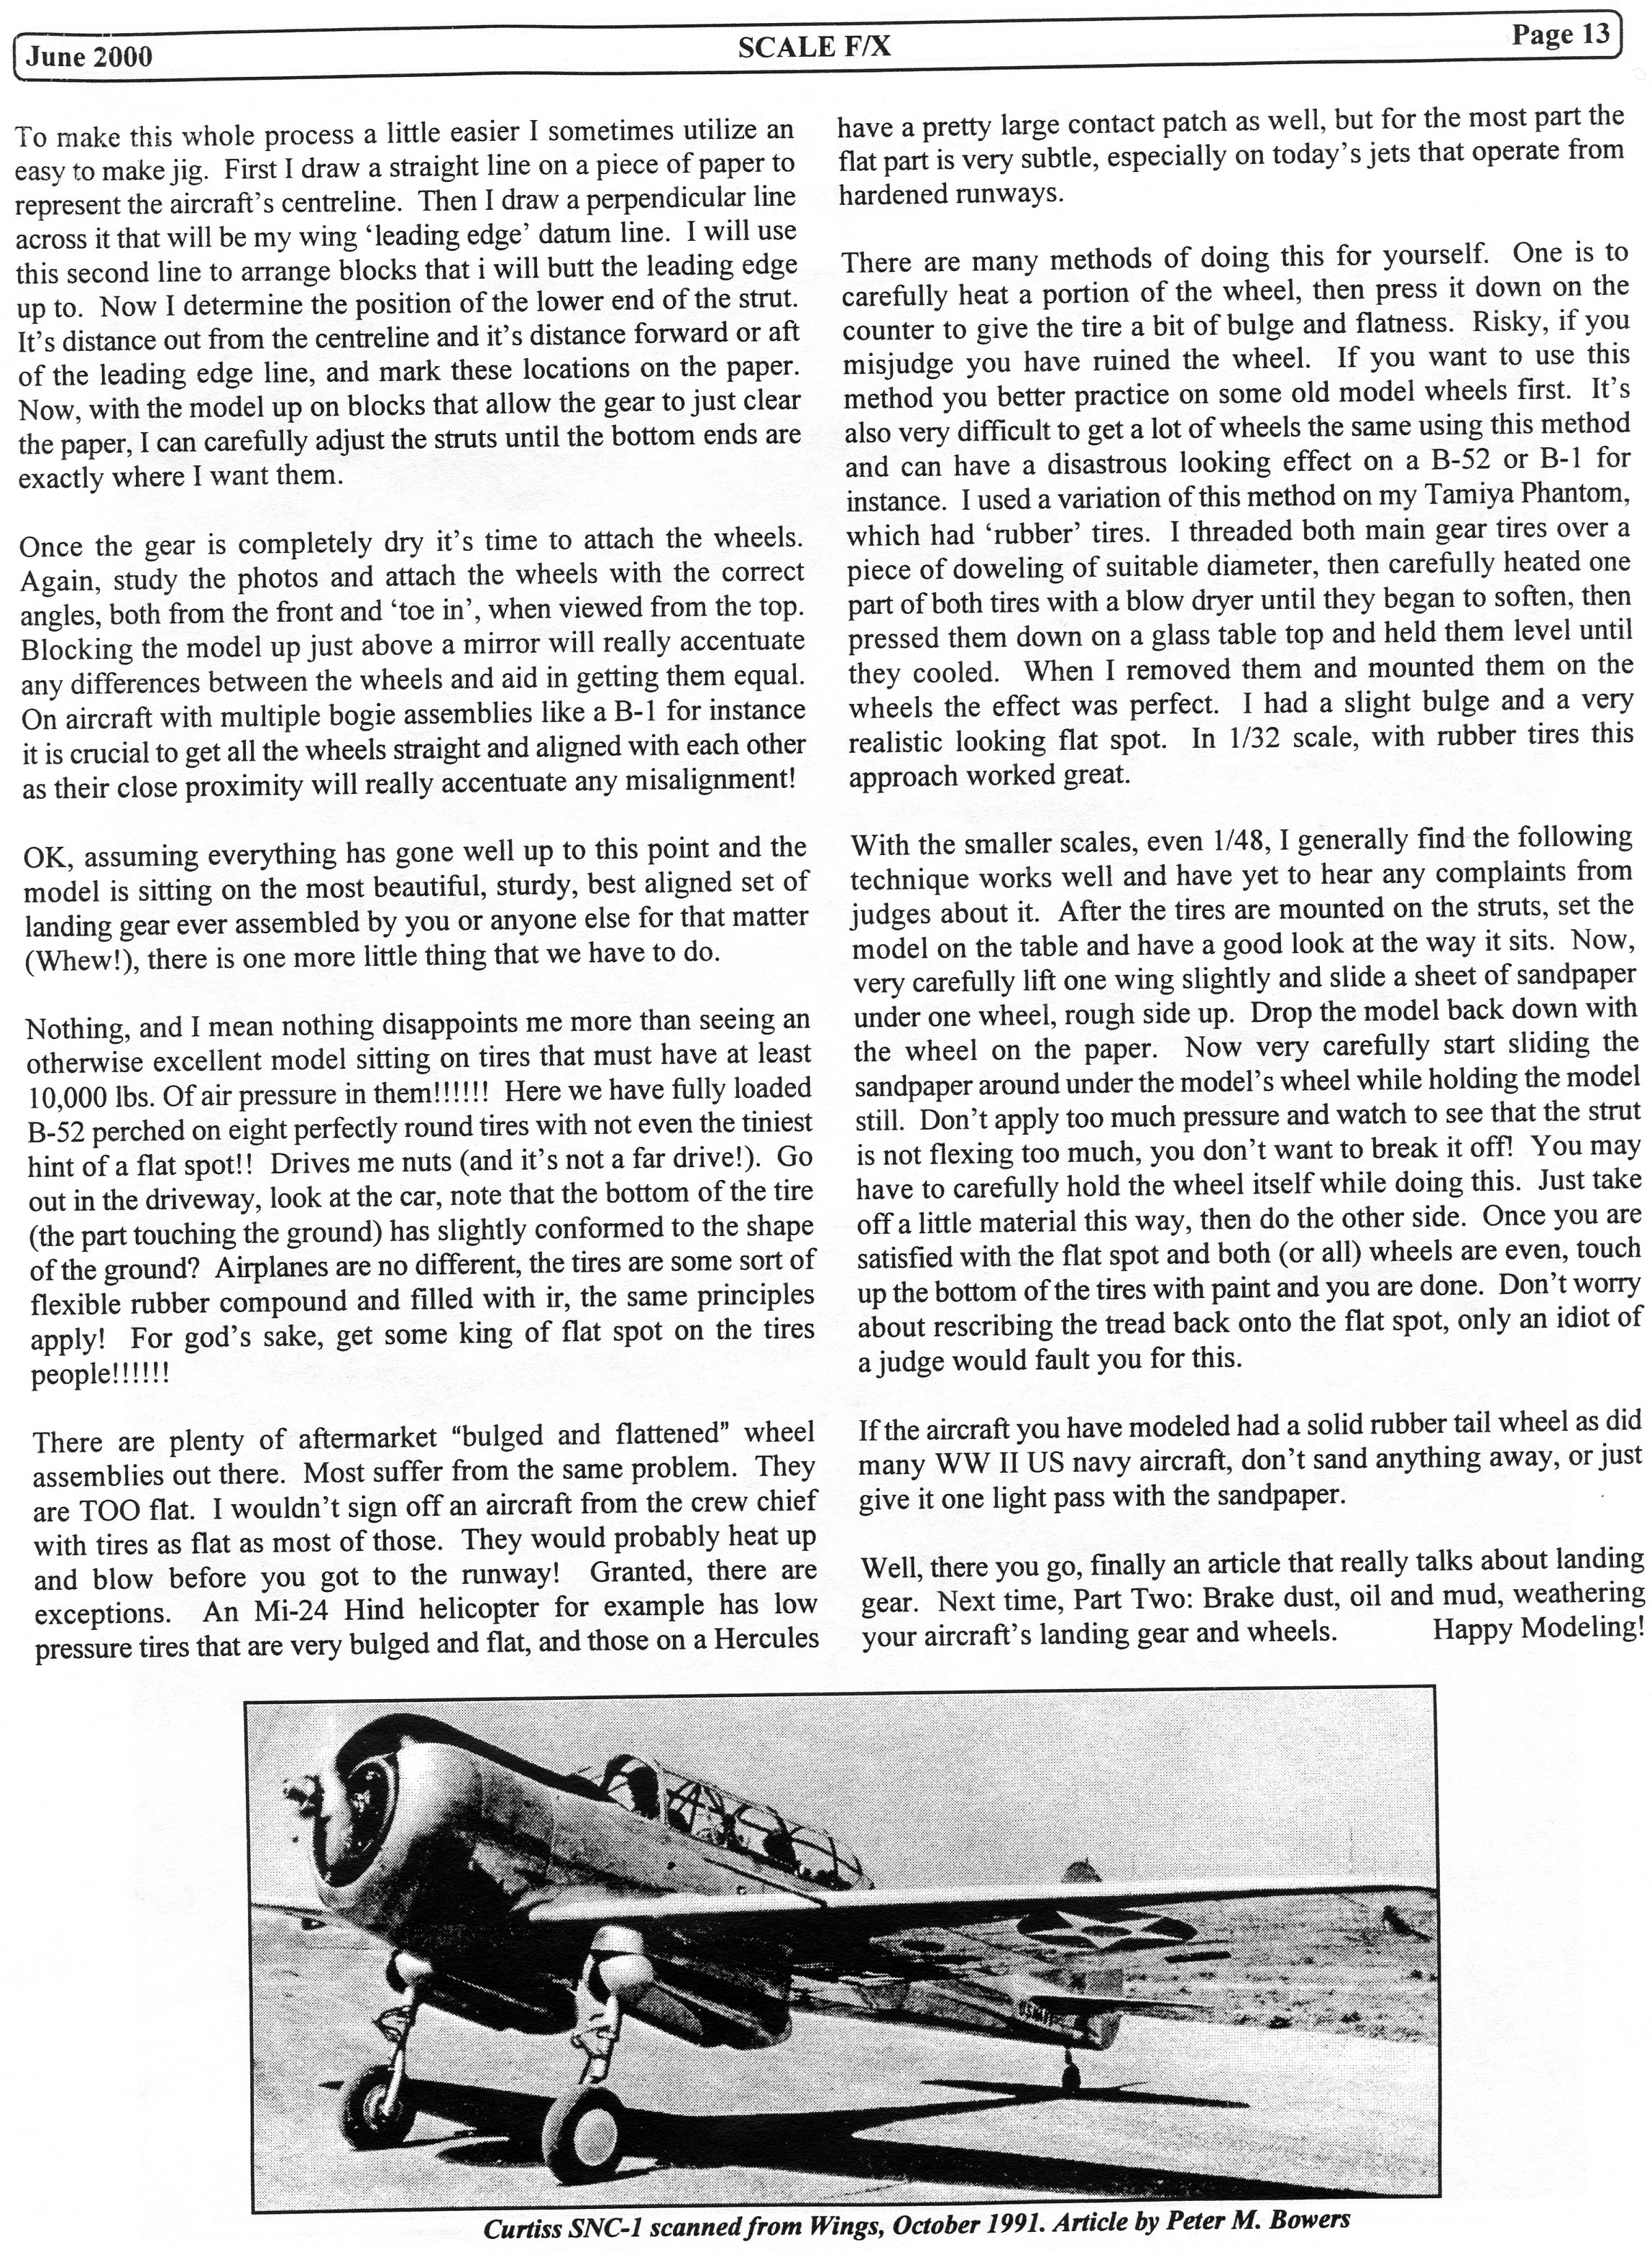
Enjoy this extremely informative how-to article about modeling aircraft landing gear, written by Dave Irons and published in the IPMS Toronto newsletter in June 2000.
Please enjoy this fantastic video of a groundwork seminar conducted by IPMS Toronto member Ying Louie at our July 2015 club meeting. Ensure you also read through the comprehensive notes below which Ying provided to supplement the video. Credit for the video goes to Robert Wlodarek.
Additional Notes:
The next progression to our models whether it be figures, trains, cars, or tanks. We want to see our models viewed in a form of reality.
Our best instructor is nature itself, where we just need to look out the window.
1. Begin with a theme a setting or backdrop for your model referring to a place, and time period.
2. Always look toward reference books, internet, and other sources that you find.
Note
Scenery like all elements model/figures etc.. are all equal components together we should not treat any element with half hearted effort.
Put the best of your skill into all your elements.
Presentation
First your base, should be a decent style display clean and clear of imperfections and faults if helped.
Choose a manageable size, balance your work to your base, oversizing and undersizing will challenge your base.
Placement and positioning
1. Avoid linear placement, having offset, or angled subjects will stimulate the viewers eye.
2. Choose the viewing direction of the subject and build around it.
3. Visual interest such as height and angles will enhance your viewers eye.
4. Work out the positive and negative space to balance your work.
5. Place your work towards a direction of light.
Ingredients to Groundwork
The Tools
White glue, dull coat spray, scour pads, insulation foam, sculpting tools, knives, train supply scenics, resin aftermarket items,
items of nature, art supplies, and model kit accessories are some of the many tools for dioramas and vignettes.
From the Trains store
Static grass, poly fibre, hydo-cal, shrubs, fine chipped foam, and trees, are some of the items we borrow to make ground work.
The Art supply store
Sculpa-Mold, Das Pronto, sculpting tools, x-acto knives, some paints like oil, and acrylic can be found here.
The Hardware store
White glue, scour pads, extra fine steel wool, foam insulation, plumbers seal are what you can search and find in these likely places.
The Hobby shop/Internet
Finding the accessory model kits for scenery, road signs, buildings, architectural foundations, resin and plaster aftermarket items are the likely things to find here.
Outside to mother nature
Soil, dry leaves, roots, stones, and small branches are real nature. Real nature looks best in your groundwork.
Real nature supplies great items like that of dry clay making great soil. Rain run off areas for soil.
Other areas I like to search are under bridges for soil.
Clumps of dry clay found by the streams, rain run off areas, uprooted trees, areas of soil erosion, under the bridge, limestone walk way (Stones).
Garden wood chips are great scenery additions.
Before your begin
Choose your base, you can find your base supplied by almost anyone.
A trophy shop, an art store, and even a dollar store.
Choose the size area that will look good with your model.
Groundwork
This part will be dictated by where you want your display to be. Seasons like fall, winter, summer are things to be considered.
History pictures of the places like that of towns or cities will make you think of urban scenes.
If you can think about the layout of how your going to place your elements before you begin, would really help your start.
It is here you consider placement and positioning. One thing we should all think of is a “catch idea” to create interest and to stir conversation.
Putting something interesting into your scenery like an animal of sorts, or a discarded piece of garbage.
Lets get started.
Place your frame out and find it’s size to balance your model work.
Take the size and measure it out to cut out your insulation foam. It’s easy to cut with a sharp knife or saw.
Think now about height and elevation. This is also the best time to consider angles and perspective views.
Use a sanding block to smooth away your imperfections.
Lay your foundation and plot your scenery items.
Using the Art supply store Sculpa-Mold, or Das Pronto try your hand with sculpting tools.
Shape your scene the way your want it to appear. The tools and the scour pad will texture a convincing surface.
If you have a model you will need to place it into the foundation and wait for it to dry.
Ensure you have a non-stick release on the vehicle such as Vaseline to help the model not to stick to the foundation.
Most foundations will shrink when drying, and is the reason to place the model in place at this time.
After foundation is dry you need to apply a primer coat of spray paint that will help with the painting that will come later.
Any items that are made of plaster will also be ready for paint if it is already painted with primer.
If your doing an outdoor scene now is the time to apply your glue to soils, static grass, and vegetations.
When laying things like static grass, we layout areas with diluted white glue, sprinkle the grass, blow the grass to standing. After the grass has dried we can then airbrush
and drybrush it. Tall grass can come from the hairs of a natural paint brush, plotting it out and place it with glue, or the use of extra fine steel wool.
Follow the actions by glue it, let it dry, brush it up, prime it, airbrush it, and drybrush it. Trees are roots that you find outdoors, upended, applying poly fibre to the roots.
Apply some glue to the fibres and sprinkle crushed leaves, or other items like railroad chipped foam. There is one other item new is Photo-Etch.
Certain points when using photo-etch. It is important to prime it, and to bake the primer to harden and make it resilient for use.
Choosing realistic greens use the airbrush to colour your photo-etch plants, last to give them a oil wash.
Here you can think about the angle of light and drybrush the textures to highlight toward the light direction.
Urban scenes start at the moment you plan your foundations like plaster items and resins. My thoughts about plaster and resin items are as follows
Prime it, paint it, wash it, drybrush, and detail paint it.
After the groundwork is applied and properly dried, we begin the painting process. Please avoid painting the natures roots for they already have a natural colour
that you will not have to paint again. The best efficient method will be the airbrush to detail colour your work. When you start airbrushing, I like to use acrylic paints,
it is logical to pre-shade your work using the airbrush. There are some areas of nature added, and railroad supplied products that do not require painting,
please use your judgement.
When the airbrushing is dry I come back to applying a liquid wash using artist oil paints. This will enhance the crevices and shadows of your scenery creating depth.
When the oil wash is finally dry we can begin the artist process of painting highlights and shadows with oil paint. I like to apply this process with a series of flat brushes
which adds enhancement to the blending of the oil paints to the surfaces of what we paint, and remember your painting toward and angle of light, and a point of interest.
After we have satisfied painting our work we last cover most of the shiny painted oils with a coat of dull coat spray.
My last ending point I will take from my design years to consider in everything you do… “LESS IS MORE!” Without question you can always overdo the amount of details.
IPMS Toronto member Ying Louie is one of Canada’s most renown armour and diorama builders. He has won numerous awards and is now going to share his techniques of “Groundwork Modelling” at our July 6 IPMS and AMPS Toronto meeting. Topics covered will be theme settings, presentation styles and techniques, placement & positioning, ingredients to groundwork, and airbrushing/painting.